Thursday, January 19, 2012

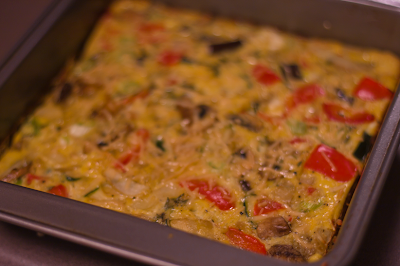
Veggie Fritatta


Mmm we've been on a veggie kick in my apartment this week, so here's my contribution to the the healthiness.

Ingredients
  • 2 T olive oil
  • 2 cloves garlic, minced
  • 1/2 yellow onion, diced
  • 1/2 c mushrooms, sliced
  • 1 red bell pepper, diced
  • 1/2 zucchini, diced
  • 1/4 c eggplant, diced
  • 1/4 c parmesan cheese, shredded
  • 6 eggs
  • 1 stalk green onion, sliced (only white part)
  • salt and pepper
Directions
  1. Heat olive oil in large pan and saute garlic till fragrant
  2. Add in onion and saute till soft, put aside garlic and onion
  3. In the same pan, saute mushrooms till soft and shrunk to about half the size, put aside mushrooms
  4. Saute bell pepper, zucchini and eggplant until just soft.
  5. Beat 6 eggs until combined, add green onion, salt and pepper to taste. Combine cooked vegetables, parmesan cheese, and beaten eggs in a 8x8 baking dish.
  6. Bake frittata at 350 degrees for 20 minutes. Broil for another 3 minutes at end.

Saturday, May 28, 2011

Feta Green Onion Waffles

Well I was looking at this recipe for cheddar onion biscuits and they just looked so darn good. Scrambling around my kitchen I found myself some feta cheese and green onions and bisquick, perfect for a savory snack. These were so good, I made myself another batch this morning.


Ingredients
  • 1 egg
  • 1/4 c Feta Cheese
  • 1 c Bisquick Mix
  • 1/2 c milk
  • 1 t vegetable oil
  • 1 green onion chopped
  • 1/4 t salt
  • 1/2 t freshly ground pepper
Instructions
  1. Preheat waffle iron.
  2. In a mixing bowl, beat the egg,and then add all other ingredients. Mix until well combined.
  3. Place mix on waffle iron, should make about 2 waffles. Cook 1 minute longer than normal waffles on your iron.

Feel free to top with some more feta cheese crumbles.

Thursday, November 18, 2010

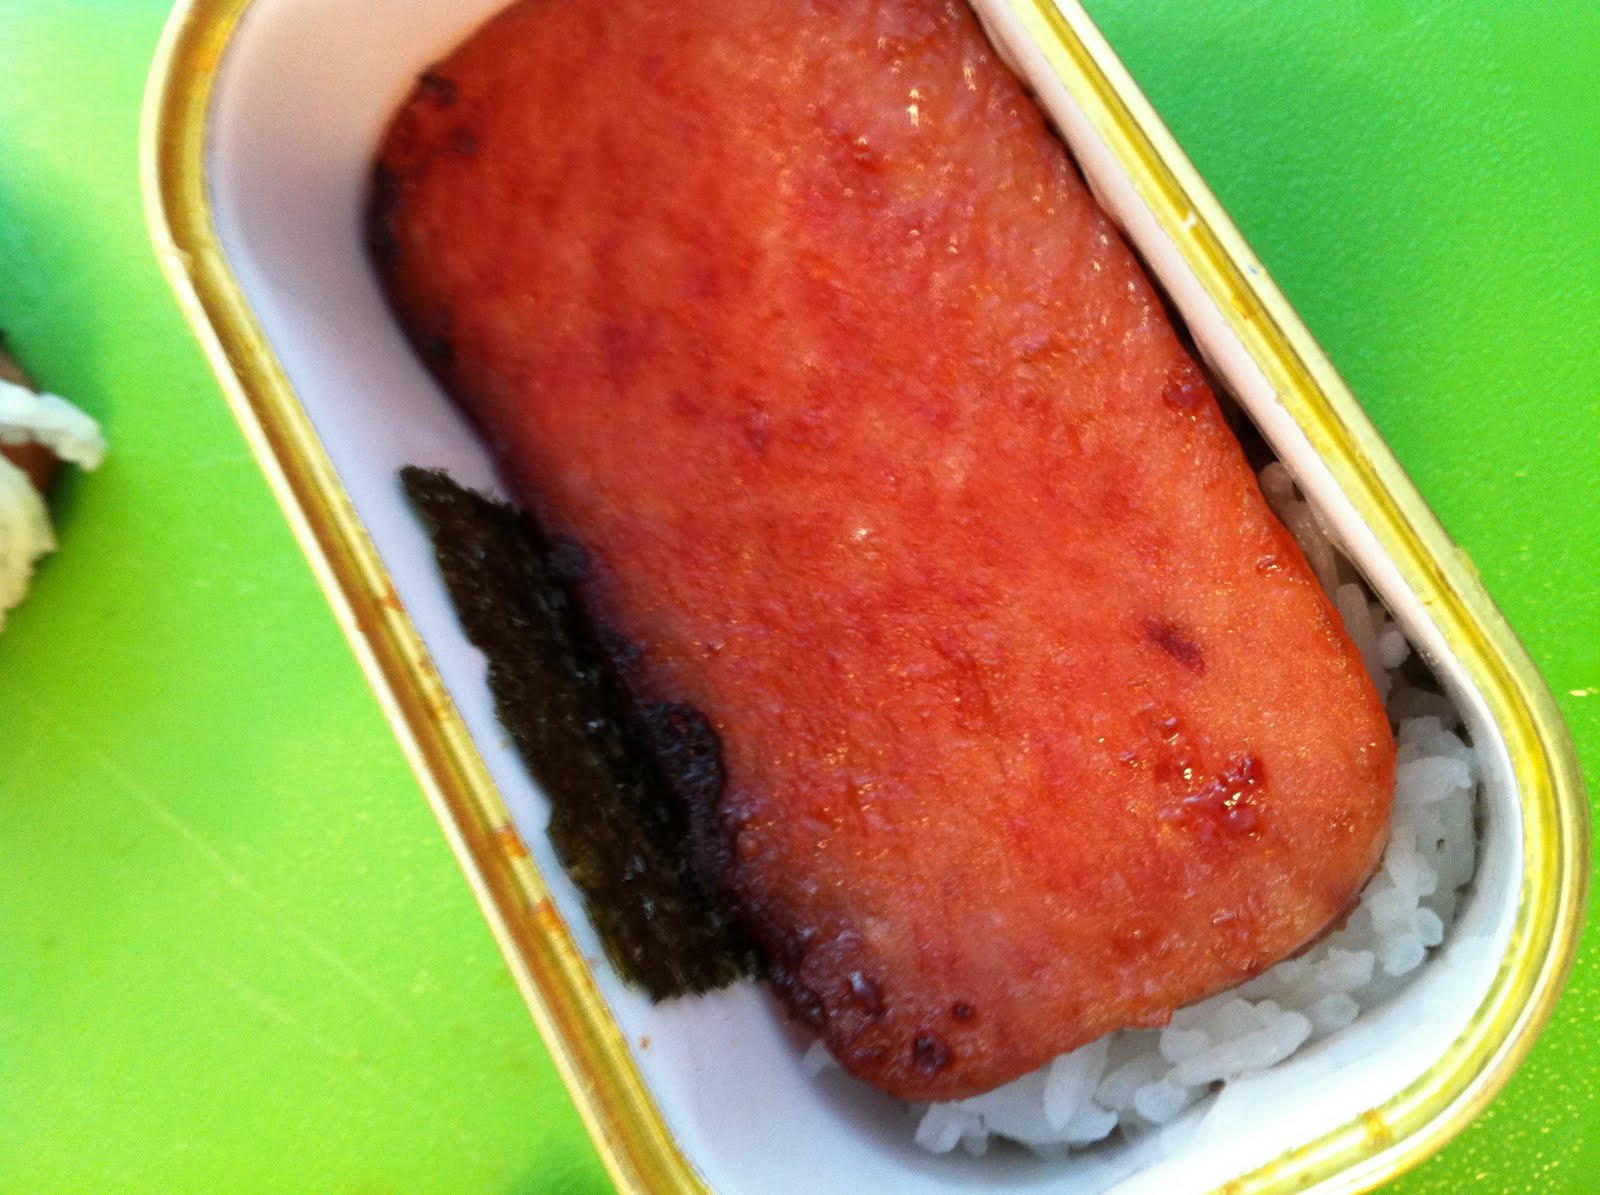
Spam Misubi

  • nom nom nom nom. i actually don't like spam. but i do like anything even closely related to sushi. and i guess my love of sushi is greater than my dislike of spam.

okay i'm going to make up for the lack of directions with just a whole lotta pictures.


Ingredients
  1. 1 cup uncooked jasmine rice
  2. 1 T sushi vinegar
  3. 1 can spam (I think I used a 8 oz can)
  4. 1 T soy sauce
  5. 1 T oyster sauce
  6. 1 T white sugar
  7. 10 seasoned dried snack seaweed pieces
Instructions
  1. Make your rice, preferably in a rice cooker, otherwise equal parts water and rice in the pot. When your rice is finished, add the vinegar and stir well, then place in fridge to cool.
  2. Cut up spam on the side into ~5 slices
  3. Mix soy sauce, oyster sauce and sugar, and coat spam in the mixture.
  4. Fry spam for about 5 minutes on each side until golden.
  5. Pack rice into your spam can, nice and tight. Put a spam piece on top, then lay a seaweed piece over the spam and flip over. You might have to hit the can a couple of times to get everything out. Add the second piece of seaweed on the rice side, and use some water to stick the two seaweed pieces together on their overlap.
  6. Repeat. And then eat :D

Monday, October 11, 2010

Spinach Orzo Salad

I went to a potluck on Saturday that I was not aware of until late friday night...so had to make something quick and easy and would feed a good amount of people. I also had to get my car setup for gettaround (sign up if you're at ucsd) so I was carless and making food at Alex and Elliot's place. Interesting because I didn't know where any of their bowls were, or their utensils/ they are not exactly the cleanest boys so everything was in the sink or sitting on the table etc...
But this is a dead simple recipe which you can do for under $8 to feed like 8 people even under dire circumstances.

Taken from all recipes with a few minor changes. http://allrecipes.com//Recipe/spinach-and-orzo-salad/Detail.aspx

Ingredients
  • 1 (16 oz) package uncooked orzo pasta
  • 1 (10 oz) package baby spinach leaves, finely chopped
  • 1 large cucumber, diced
  • 1 1/2 cup cherry tomatoes, quartered
  • 1/2 pound crumbled feta cheese (optionally with mediterranean spices, found some at Trader Joes)
  • 1/2 teaspoon dried basil
  • 1/2 teaspoon dried oregano
  • 1/2 teaspoon dried thyme
  • 1/4 cup olive oil
  • 1/4 cup balsamic vinegar
Directions
  1. Bring a large pot of lightly salted water to a boil. Add orzo and cook 8-10 minutes or until al dente; drain and rinse with cold water.
  2. Transfer to a large bowl and stir in spinach, feta, cucumber, tomato, basil, thyme, and oregano. Toss with olive oil and balsamic vinegar. Refrigerate and serve cold.
I ended up leaving half of this salad with the boys and some for the mechanic working on my car. It makes a lot :D

Saturday, August 21, 2010

Mish-mash

Okay, so I'm getting lazy and definitely not-writing-detailed-recipes anymore.

BUT THAT'S OKAY because it (hopefully) means more regular entries (with pictures!) instead of long, empty months of abandonment.

Lemon-thyme Yogurt Cake
The lemon cake base was very tasty, but the addition of thyme, though interesting, made it a little too savory for my taste.  A friend commented that it reminded her of cornbread (texture-wise it was still quite cake-y).
A special point: it has olive oil and Greek yogurt!
Lemon-thyme recipeOriginal lemon yogurt cake recipe.

Marshmallow Cake
This no-bake cheesecake (the true nature of this deliciously fluffy concoction) is a recipe I had bookmarked for about 4-5 years before finally trying it~~  Originally found it on AllRecipes while looking for a way to use up marshmallows.

Spinach-Cheese Swirls
For these, I vaguely followed this recipe, found on the inside of the Pepperidge Farms Puff Pastry Sheets package.
My significant changes include: using fresh, instead of frozen, spinach (not a great idea, it got messy and weird, though taste-wise it was fine); using whatever cheese I had in the fridge; adding sun-dried tomatoes (delicious~).

Cold Osmanthus Honey Dessert
 Okay, I'll post a recipe for this one because, a) it's really easy, and b) the original one is in Chinese (somehow I got it right!...I think).
I made this because I really wanted Osmanthus Jelly (桂花糕) but I could only find osmanthus sauce, and no dried osmanthus flowers (have since found/bought the flowers, will make some proper gui hua gao sometime soon).
Note: it's very very sweet (well duh, 1/4 cup honey?), probably accentuated by the osmanthus sauce's high sugar content.  Were I to make this again, I would switch the sauce out for flowers, compensating for this by: infusing flowers in 1/4 c. hot water while making gelatin/water mixture with only 1/2 c. water.

Ingredients:
  • 3/4 tbsp gelatin (um...I guesstimated this into 1 tbsp.  maybe. don't quite remember.  Also, now that I'm re-reading the recipe, it seems you're supposed to use tapioca flour...oops.)
  • 3/4 c. water
  • 1 tbsp. Osmanthus Sauce (桂花醬)
  • 1/4 c. honey
Steps:
  1. Add the gelatin (or tapioca flour, haha) to the water, slowly heat until it dissolves completely.
  2. Add osmanthus sauce to hot gelatin and water mixture, heat to a low boil.
  3. Remove from heat (remembering to turn off the heat, too), add honey, stir until well mixed, then pour into flat bottomed pan*.
  4. Place pan in refrigerator.  Once contents have cooled and completely congealed, remove from refrigerator and cut out cute, bite-size shapes to serve (and eat!).
*I didn't do this part right, haha (you can tell from the photo..?)!  Instead of following instructions (because I didn't understand them before, I suppose..), I poured the mixture into little silicon molds, let it cool in the fridge, then ate them out of the molds (because it seemed too difficult to pop them out).  Turns out that only the top layer exposed to air is stubbornly sticky, once you cut through that part, the rest comes out fairly easily.

Thursday, August 19, 2010

*J2Special!* La Jolla Living~

Coronado Island, not-actually-an-island, a little south of La Jolla
So back in May....at the very beginning of summer (for semester folk at least, haha..)....I (Jo) visited UCSD! :D
And of course, because people do not live on bread alone, there was cooking!  Together again ♥

Jerk-flavored chicken thighs, Jeanne's awesome stir-fried snap peas, white rice
Recipe for the chicken was partly taken off the bottle of jerk-sauce and partly improvised--basically we put the thighs in a pyrex dish with one onion (sliced), covered the whole thing with the sauce, and baked it (at 375°F?) for 30-40 minutes, turning the thighs over once.  Easy&delicious.
I'm not sure exactly how Jeanne stir-fried the snap peas, but they tasted wonderful.

♥dulce de leche cheesecake♥
For the (no-bake!) cheesecake, we bought dulce de leche in a can (by nestle!) and used the recipe printed on the label.
Yummmmy, but very, very rich.  Ummm...I don't think we finished it.

Hopefully more updates soon...before I leave for Japan!

Thursday, May 13, 2010

~*~*~* Passion-Orange Sparkling Drink *~*~*~

In celebration of warmer weather, pre/post-finals relaxation, and overall refreshment, here's a sparkling juice drink "recipe" (I like to think of it more as, "guidelines").


Serving size: 1 glass (but easily adjustable!)

Ingredients:
-1 orange, room-temperature
-passion fruit syrup
-cold carbonated water (Calistoga, San Pellegrino, club soda, etc.)
-ice (optional, but definitely nice if you have it)

Method:
  1. Juice the orange.  Be impressed by how little juice is contained in that entire orange.
  2. Pour carbonated water into a glass until 2/3 - 3/4 full (this depends on how large your glass is).
  3. Pour in your fresh-squeezed orange juice.  Be amused by how it fizzes.
  4. Add in a couple spoonfuls of passion fruit syrup.  Stir a few times, to make sure everything's nicely mixed.  Taste, then adjust sweetness and passion fruit flavor by adding a little more at a time until desired sweetness/passion is reached.

Notes:
-If you want to make A LOT of this, it's probably most practical to just buy some (not from concentrate) orange juice.
-The proportion of carbonated water to juice is approximately 3:1.  That means the final drink is 75% fizzy water, 25% OJ.  If you're inaccurate like me, err on the side of more juice, less water.
-The reason temperature is specified for the orange and carbonated water (under ingredients) is...science-y!  Sort of.  I remember reading somewhere that you get the more juice out of citrus fruits when they are at room temperature than when they are cold from the fridge (there's some scientific reason, I can't articulate it).  For the carbonated water, it comes down to gas laws: the colder it is, the more gas will dissolve into the liquid (something to do with molecular motion, I think...hey, chem was a long time ago..).  The converse is also true: the warmer it is, the less gas will be dissolved in the liquid.  This is why soda is so much more awesome cold.  Essentially, for maximum fizziness, refrigerate carbonated beverages.
-I got the idea for this combo from a can of juice concentrate, haha...
-Orange juice + Sprite/7-up is also a most excellent combo. :3

Sunday, May 9, 2010

Mini Strawberry Tarts

Peter came over and since he lacks any kitchen accoutrements at his dorm, we decided to satisfy his cravings for some home cooking. We had some fresh strawberries on hand, time, and a hankering for sugar. Since we were waiting for food to be delivered (from ATE Comfort, super yummy and cheap in the San Diego area) He called his mommy, and she gave us a pastry crust recipe. I googled and found a custard recipe. Good teamwork.


Tart Crust
  • 1 cup flour
  • pinch of salt
  • 1 T Sugar
  • 1/4 t orange peel (optional)
  • 4 oz unsalted butter
  • 1 T Water
  • 1/2 t vanilla
  • handful chocolate chips
  1. Mix dry ingredients together
  2. Cut butter into dry ingredients
  3. Add water and vanilla
  4. Mix until holds together
  5. Refrigerate for ~20 minutes until cold
  6. Divide up dough into 6 equal parts. Press dough ball into muffin pan with fingers. Push to cover bottom and sides. Try to make it an even thickness ~1/4 in.
  7. Bake at 400 degrees for 15 minutes. You might want to check after 10 minutes.
  8. Put chocolate on bottom while still warm. Spread chocolate out on bottom when melted.
Strawberry Filling
  • 1.5 cups fresh strawberries
  • 3 T sugar
  1. Cut strawberries into slices
  2. Sprinkle sugar on top, and mix
Custard Sauce
  • 1 c Milk
  • 1/4 c Sugar
  • 3 Egg yolks
  • Ice
  1. Heat milk and sugar until simmering, without stirring.
  2. Take off heat, add slowly to beaten egg yolks
  3. Return to burner, and let mixture thicken until coats back of spoon. Be careful not to overheat and cook the egg.
  4. Take off heat and stir over ice until cool
  5. Place in fridge until cold,
Tart Assembly:
  1. Wait until the tart shells are cooled off.
  2. Spoon a bit of custard into the bottom of each shell.
  3. Assemble strawberry slices on top. If you can do it artfully congratuations, if you can't it's still yummy.
Makes 6 mini strawberry tarts.

You'll probably have a lot of leftover custard, mmm. Put on ice cream, dessert, or your spoon.


Sunday, April 11, 2010

Strawberry Scones & Cupcake Craziness

I like alliteration.

But that really doesn't have anything to do with this post besides the title.

Anyway, I didn't cook much at all this past week because it was busy-busy-busy and I still suck at time management.  I did eat a lot of salad and hard-boiled eggs.  But I -did- manage to bake a couple things (real food? pshhhhaw...), and will now share them (or at least, photos of them) here~  Two recipes to recommend today:

First off...
Recipe from: Joy the Baker

The recipe lists all "organic" ingredients, but my (monetary) resources are somewhat limited, and I gotta move everything outta the apartment in a month or so, so buying a whole new *organic!* set of ingredients would have been...stupid.
Otherwise, both recipes were quite simple and reliable! :D
About the buttercream: What I adorrred the most, is that it doesn't use powdered (confectioner's) sugar!!  Instead, the frosting is thickened with a milk-flour mixture.  When making the milk-flour mixture, it doesn't ever actually need to boil; you just need to heat it until it's steaming a little, and it'll thicken up just fine.  I did notice that after a day or so in the fridge there was a bit of a not-so-smooth crystallization thing happening that probably doesn't happen with confectioner's sugar based frostings (don't really know, I don't usually make frosting...), but taste was still fine.  Compared to store-bought and other frosting recipes, it's not as sweet, but I still found it pleeeenty sweet enough.

 I made these on Easter day (4/4/10), so these were decorated to go with that lovely commercial-Easter kinda theme.  They were also frosted with some Betty Crocker vanilla whipped frosting I picked up at Safeway a while back, instead of the rose.

Concerning rosewater (that's how you get rose flavoring in the buttercream): You can get a nice, 12-oz (I think..) bottle of it at Whole Foods for $3.99 (or was it $2.99?  either way, less than $5).  That's cheaper than an itsy-bitsy bottle of vanilla at some places (definitely cheaper by-the-ounce than anywhere else).  Wow.  And it feels like such a luxurious, gourmet flavoring~  Don't try drinking it straight, though.  Please, please trust me on this.  Seriously.  Don't.

...and another set decorated with the vanilla store-bought frosting.  I gave these to some of the sophomore guys in my fellowship--the chocolate cake is our sinful lives before Christ, the red sugar the drops of blood Jesus shed, the white frosting the forgiveness and grace with which He purifies and covers our sins, and the egg representative of new life in Him.  Complex, cheesy (not in actual, physical taste! just in meaning), and...eggy all at once.  Yeah, I'm aware that the toppings look like bloody fried eggs...

and to finish...
Recipe from: Confessions of a Tart (cute name, yeah? XD)

These were the first shaped/cut/then-baked scones I've made in a couple years.. you know, where you pat the dough into a circle and then cut triangle slices out to bake..?  yeah.  I usually just do drop scones because it's a lot easier and much less messy.  But I had a lot of extra strawberries, and I figured, as a scone-lover, I really ought to give these a try..
They were pretty yummy, and really not as much of a pain as I'd imagined (even the cutting in little butter cubes part).  The strawberries were quite juicy, and it all turned out rather tasty~

Sunday, March 28, 2010

*J2 Special!* Strawberry Coffee Cake

This entry is special!


Why so special?


Because it's the first one we've made together this year AND uploaded to the blog. :D


yayyy~ :'D

Look it's so puffy! Look it's so sweet. Look, I am hungry all over again.

Sunday, February 28, 2010

Back to the Book - Cloverleaf Rolls & Blueberry Buttermilk Muffins

There's something oddly comforting about using recipes that (wow this is going to sound so 20th century) come from a book.  Or print resource (i.e., magazine).  NOT from allrecipes, NOT from epicurious, NOT from someone else's foodblog.  So weird..

 try to ignore the mirrored text.  yay for free browser-based webcam apps.

Seeing the method/photos/commentary on someone else's blog makes me feel way more reassured and trusting about the recipe they recommend, though.  Whereas when it comes from a book, you get maybe a couple sentences of intro/commentary, a perfect result picture/photo (haha, step-by-step, those books are...more expensive), and a supposed assurance of recipe-testing because, yeah, this did make it to print, right?  That strange tendency to believe in solid things..


Anyway, enough rambling!  The following recipes are both from real books.  Like, the book was open while I was cooking!  In the kitchen, on the counter, getting splattered by batter!  CRAZY, I know.
(I was going to copy the recipe WORD for WORD, but then I realized that was, like, plagiarism.  You know, that thing that makes a 10-page paper worthless, screws your academic record up forever, bad-bad-bad, etc. hmmmmm.  Err I'm no awesome recipe writer, so this is still going to be sort of word-for-word, and then where there are more words, i'll use my own.  oookay.)

Thursday, February 25, 2010

Rosemary Redundancy

I'm terrible at clever titles, so I really ought to stop trying. >_>;;;

Anyyyway, this commonality in this batch of recipes is...ROSEMARY.  mmmm.  very...fragrant.  yeah.  kinda minty.  often featured in scalp washes.  but uhh that's not what I used my $2.69 (+tax!!) little .75 oz (not even a full ounce!!) box of the herb (no, not that kind of herb) for.

1) Rosemary Bread - this was the main reason I bought rosemary.  I reeeally wanted to try baking bread from scratch, this recipe had pretty decent reviews and a nice picture (yeah, photos really can matter), so..I did it. 8D  Probably because this was my first time baking bread (allll by myself), the results, though lovely-smelling, were kinda so-so on taste/texture levels--a little too dense, not much flavor.  Probably could've used more kneading.  In all honesty, it was mediocre, and one of my first thoughts was: "I'll stick to store-bought".  It did make really good toast, though (like on reviewer on allrecipes mentioned, haha..).  Less of a sandwich bread, far more suited to soup-dipping.  Which leads rather nicely into...
2) Creamy Potato with Rosemary Soup - AHHHH.  it was good.  (need I say more?  not really, but I will, hahaha.)  I eventually might also add it to a possible post, perhaps titled "Adventures in Immersion Blending: Going Outside the Canister".  Or I might never write that post.
Anyway, this soup is awesomely-amazingly thick and creamy.  it's kind of like liquidy (in the best way possible) mashed potatoes.  I happen to like mashed potatoes, so this really worked for me. :P  It's a bit of a fatty, starchy soup, though (well yeah, "creamy", duh), and time-consuming to make; I'd use it again for a special occasion.
note: expect more potatoes in future posts.  I bought a 10-lb bag of them, on sale, at Safeway for $0.99.  Less than a week later, 5-lb bag is for $3-4.  :)
3) Rosemary Lemon Cookies - most delicious shortbread I've been able to bake. probably thanks to an excellent recipe.  ^o^  The only thing I did differently from the instructions was to add half a teaspoon of peppermint extract (was going to use it for peppermint bark, but never got around to it with finals and all...).  There's still one more log in the freezer, so maybe I'll have more cookies to enjoy (with half the effort!) in a week or two~~

Tuesday, December 8, 2009

Hearty, but not Heavy -- Shepherd's Pie

fun fact: my apartment is so cold, the sauce oil in my instant noodle packet congealed.

fun fact II: my apartment is so cold, that even after two hours on the counter, the butter barely softened.

fun fact III: a space heater works more effectively when you put it in an open area, instead of cramming it into a tiny little space...(i.e., the room is warmer now that the space heater isn't trapped under my desk where my feet are)... :P


Wellll, it's been extra cold these past two days (DUDE, snow in the bay area!  last time this happened was... 3 or 4 years ago?  yeeah), and I was extra hungry today, so I reeeally wanted to try this Shepherd's Pie recipe I saved from Allrecipes~  Since I made a slightly altered and somewhat reduced version, I'll fully explain it here.


Essentially, this shepherd's pie was layers of stuff:
mashed potatoes au gratin (= cheese topping ;D), over
mashed carrots (plain), over
fully-cooked ground beef and onions

Because I am lazy (and because I've had a box sitting around since the beginning of the school year..), I used instant mashed potatoes...the dried flakes that come in a packet, that you add to milk, water, and butter.  IT IS DELICIOUS, no matter how weird it is... and it worked just fine for this recipe.  meh.

 Ingredients (for approx. 1 qt. casserole, a fairly small size, especially convenient for households of...one)
  • 1 packet from the box of seasoned mashed potatoes (enough for 2 people, it says..)
  • 1/2 a shallot, minced
  • 2 carrots, chopped into large pieces (you might actually want another half or whole carrot)
  • 1/2 an onion, chopped (I used a "sweet onion"..it looked yellow?)
  • 1/2 lb ground beef (I'm not sure how much I actually used...it was probably more)
  • 1 tbsp. flour
  • 1/4 c. beef broth
  • 2 tsp. Hoisin sauce
  • Several generous handfuls of grated cheddar cheese
  • oil for frying, milk/butter/water for potatoes (follow the instructions, yeeeah), a little bit of salt
Note: I was also going to add some canned corn, but the leftover corn from a can I opened...a while ago (maybe two weeks?)..was ALREADY MOLDY.  :(  ewww.  greenish blue spots and all, yo.  Instead, I added a layer of zucchini slices (1/2 a zucchini) to the individual casserole.

    HOW-TO:

    Depending on how long it takes for your oven to heat, and how long you take to make the layers, remember at some point in the recipe to preheat your oven to 375°F.
    1. Boil some salted water, and when it's rolling right along, add the carrots, and wait for the water to boil again.  Boil until carrots are soft-ish (approx. 5-7 minutes).  Dump out the water and mash the carrots until lumps are whatever you will tolerate. Laver 2, ready!
    2. Make the mashed potatoes; while still warm, add a handful (according to the original recipe halved, "2 tbsp") of cheddar cheese.
    3. Saute the shallots in a liiittle bit of oil  until they are fragrant and starting to go clear.  Remove from heat and add into potato/cheese mixture.  Layer 1, ready!
    4. Heat some oil over medium, medium-high heat (depends on how patient you are, ahahaha...), and cook the onion until pieces are clear.  Add the ground beef and cook till well browned.  At this point you can either pour off the fat, or just leave it in the pan like a certain lazy recipe writer (hey, I bought the 90/10 instead of the 80/20 for a reason..gosh, what we're willing to pay for convenience..).
    5. Sprinkle flour over beef and stir in until you don't see anymore white powder.  Cook for 1 minute, then add the beef broth and Hoisin sauce (the original recipe called for ketchup, which I don't have--not even stolen packets from In-n-out or McDonald's or the dining commons, sad, I know).  Bring mixture to a boil, then simmer for 5 minutes.  Or slightly longer than that, depending on how long you forget about it. >_>;;;
    6. Remove beef from heat. Layer 3, ready!  Now it's time for casserole-assembly.  HOW EXCITING.
    7. Because homemade frozen food is infinitely cooler than commercial, store-bought, chock-full-of-preservatives frozen food, I followed the process described in this Just Bento article (it's really short, no worries) to make a bunch of muffin-tin sized pies that I can nuke(or toast)-and-eat through finals week (instead of wasting hours upon happy hours cooking).  I made eight muffin-sized (..in a muffin tin), and one individual dinner-sized one (typical Marie Callendar potpie-size?) in a 2-cup round pyrex container.

    8. Pour the beef and onions into the bottom layer, spread some mashed carrots over that, top with a scoop of mashed potato, cover generously with cheese, and pop it in the oven for 15-20 minutes.  It is recommended that you check on it after 15 minutes, and every 3-5 minutes after that it remains in the oven.

    9. Remove it when done.  If you want to freeze anything, let it cool to room temperature first (or if your room is like mine, it's near equivalent to a refrigerator..oh wow, the temperature's below freezing outside..32°F), then pop the mini-pies into the freezer.  If you have room, you can shove the whole tin in, or if there isn't as much space, carefully remove the pies from the tin and freeze them on a plate or something.  After they're thoroughly frozen, put in a freezer bag (I haven't bothered with foil yet...we'll see how that turns out) and leave in the freezer bag until the next time you're hungry.  While you're waiting for the to-freeze-pies to cool, though, enjoy the rest of your pie fresh, warm and toasty. :)
    A tip I learned from Joy of Cooking about cooking stuff in muffin tins (not sure if it only has to apply to muffins, you know?):  if there are any empty cups, fill them with a few tablespoons of water before baking; this prevents stuff in the filled cups from getting too dry.  It also allows for more even heat distribution throughout the pan. :)  That's usually a good thing in baking, yeah?


    Fun Fact Finale: I have an unfortunate tendency to forget about the stuff I put in the oven, especially when I start using the laptop while waiting for it to cook. :P  Thanks to this, many cookies have come close, and some lost, to burnt disaster.
      Friday, November 27, 2009

      Chicken and Dumplings

      A few weeks ago, one of my friends, Danni, got appendicitis. A group of us went down to visit her in the hospital. It was fairly late, our bus wasn't arriving for another 45 minutes and we were starving so we headed down to the hospital food service area. They had some soup and dumplings. Personally I only got a single dumpling and some gravy which fetched an odd look from our cashier. The dumpling was split between 3 people and was so yummy that I just had to go back for more. Who would have known a lump of dough could be so tasty?

      Ingredients
      For Chicken Soup
      • cooked chicken carcass 
      • 1/2 onion, roughly chopped
      • 5 cups boiling water
      • 2 celery stalks, 1/2 inch pieces
      • 1 large carrot, 1/2 inch pieces
      • 1 t dried thyme
      • salt and pepper to taste
      For Dumplings
      • 2 cups flour
      • 2 T baking powder
      • 1/2 t salt
      • 1/2 t sugar
      • 1/4 cup melted butter
      • 1/2 c milk
      Instructions
      1. In a large saucepan, start heating up the chicken pieces, letting it get aromatic along with the onions. Cook for about 5 minutes, the onions don't have to be soft yet.
      2. Add the 5 cups of water to the chicken, and celery, carrots,  thyme and salt and pepper. Simmer for at least 30 minutes. 
      3. While the stock is cooking, start making the dumpling dough. Mix all the dry ingredients together, and then the butter, and slowly mix in the milk until it forms a dough. Knead the dough maybe 8 times. Form the dough into 1.5 inch diameter balls. Set aside.
      4. When the broth has finished simmering, fish out the chicken carcass pieces. Pick off any remaining meat and place in the broth. The broth should still have onion, carrot, and celery pieces.
      5. Place the dough balls into the simmering water and place a lid on the pan. Do not open for at least 15 minutes as the dough is cooking in the steam. When the dumplings are ready they should float to the top, enlarged and fluffy. Check to make sure the insides are cooked by inserting a toothpick. If they are not done, cook for another 5-10 minutes with the lid on.
      6. When the dumplings are ready, serve the soup and dumplings together immediately.

      Wednesday, November 25, 2009

      Salmon Provencal

      This is what fresh fish should taste like. Simple but beautifully soft and succulent.
      I got the recipe from Simply Recipes but again I made a few modifications.


      Ingredients
      • 2 Fresh Salmon Fillets
      • Olive oil for baking Salmon
      • 2 T Olive Oil
      • 1 T Balsamic Vinegar
      • Juice of 1/2 Lemon
      • 1/2 t Dried Thyme
      • Salt and Pepper
      • 2 Springs Green Onion, chopped
      • 1 Medium Tomato, diced
      • 1 Garlic Clove, minced
      Instructions
      1. Preheat the oven to 400 degrees
      2. Place the salmon on a greased baking dish, drizzling olive oil on the fish. Salt and pepper to taste.
      3. In a small bowl, mix together the 2 Tablespoons of oil with the balsamic vinegar, lemon juice, and thyme. Squeeze a few drops of lemon juice onto the salmon.
      4. Place the salmon in the oven for 10-12minutes, until pink and just barely cooked through. There may be some cooked fat collecting around the salmon.
      5. Serve the fish immediately topped with the green onions, tomatoes, and garlic and then the oil, balsamic mixture drizzled on top. Garnish with a lemon slice. 
      6. Goes well over a bed of pasta, rice, or spinach.